Guide
The Db2 for i extension allows users to browse database schemas, execute SQL statements, and more, on an IBM i.
Install
The extension can be installed from the Marketplace and is also part of the IBM i Development Pack .
Server Component
As of 0.3.0, the Db2 for i extension requires a server component. The component provides improved performance and makes it easy for us to add advanced features. The Db2 for i extension manages the server component installation when you connect to an IBM i with Code for IBM i and will ask the user to confirm any installation or update. The server component is installed into $HOME/.vscode, which means a per-user installation. The server component is also open-source .
Executing Statements
Either:
- open an existing
.sqlfile (source member, streamfile or local file) - create a new file
- create a file (control / command + N)
- change the language ID to
sql
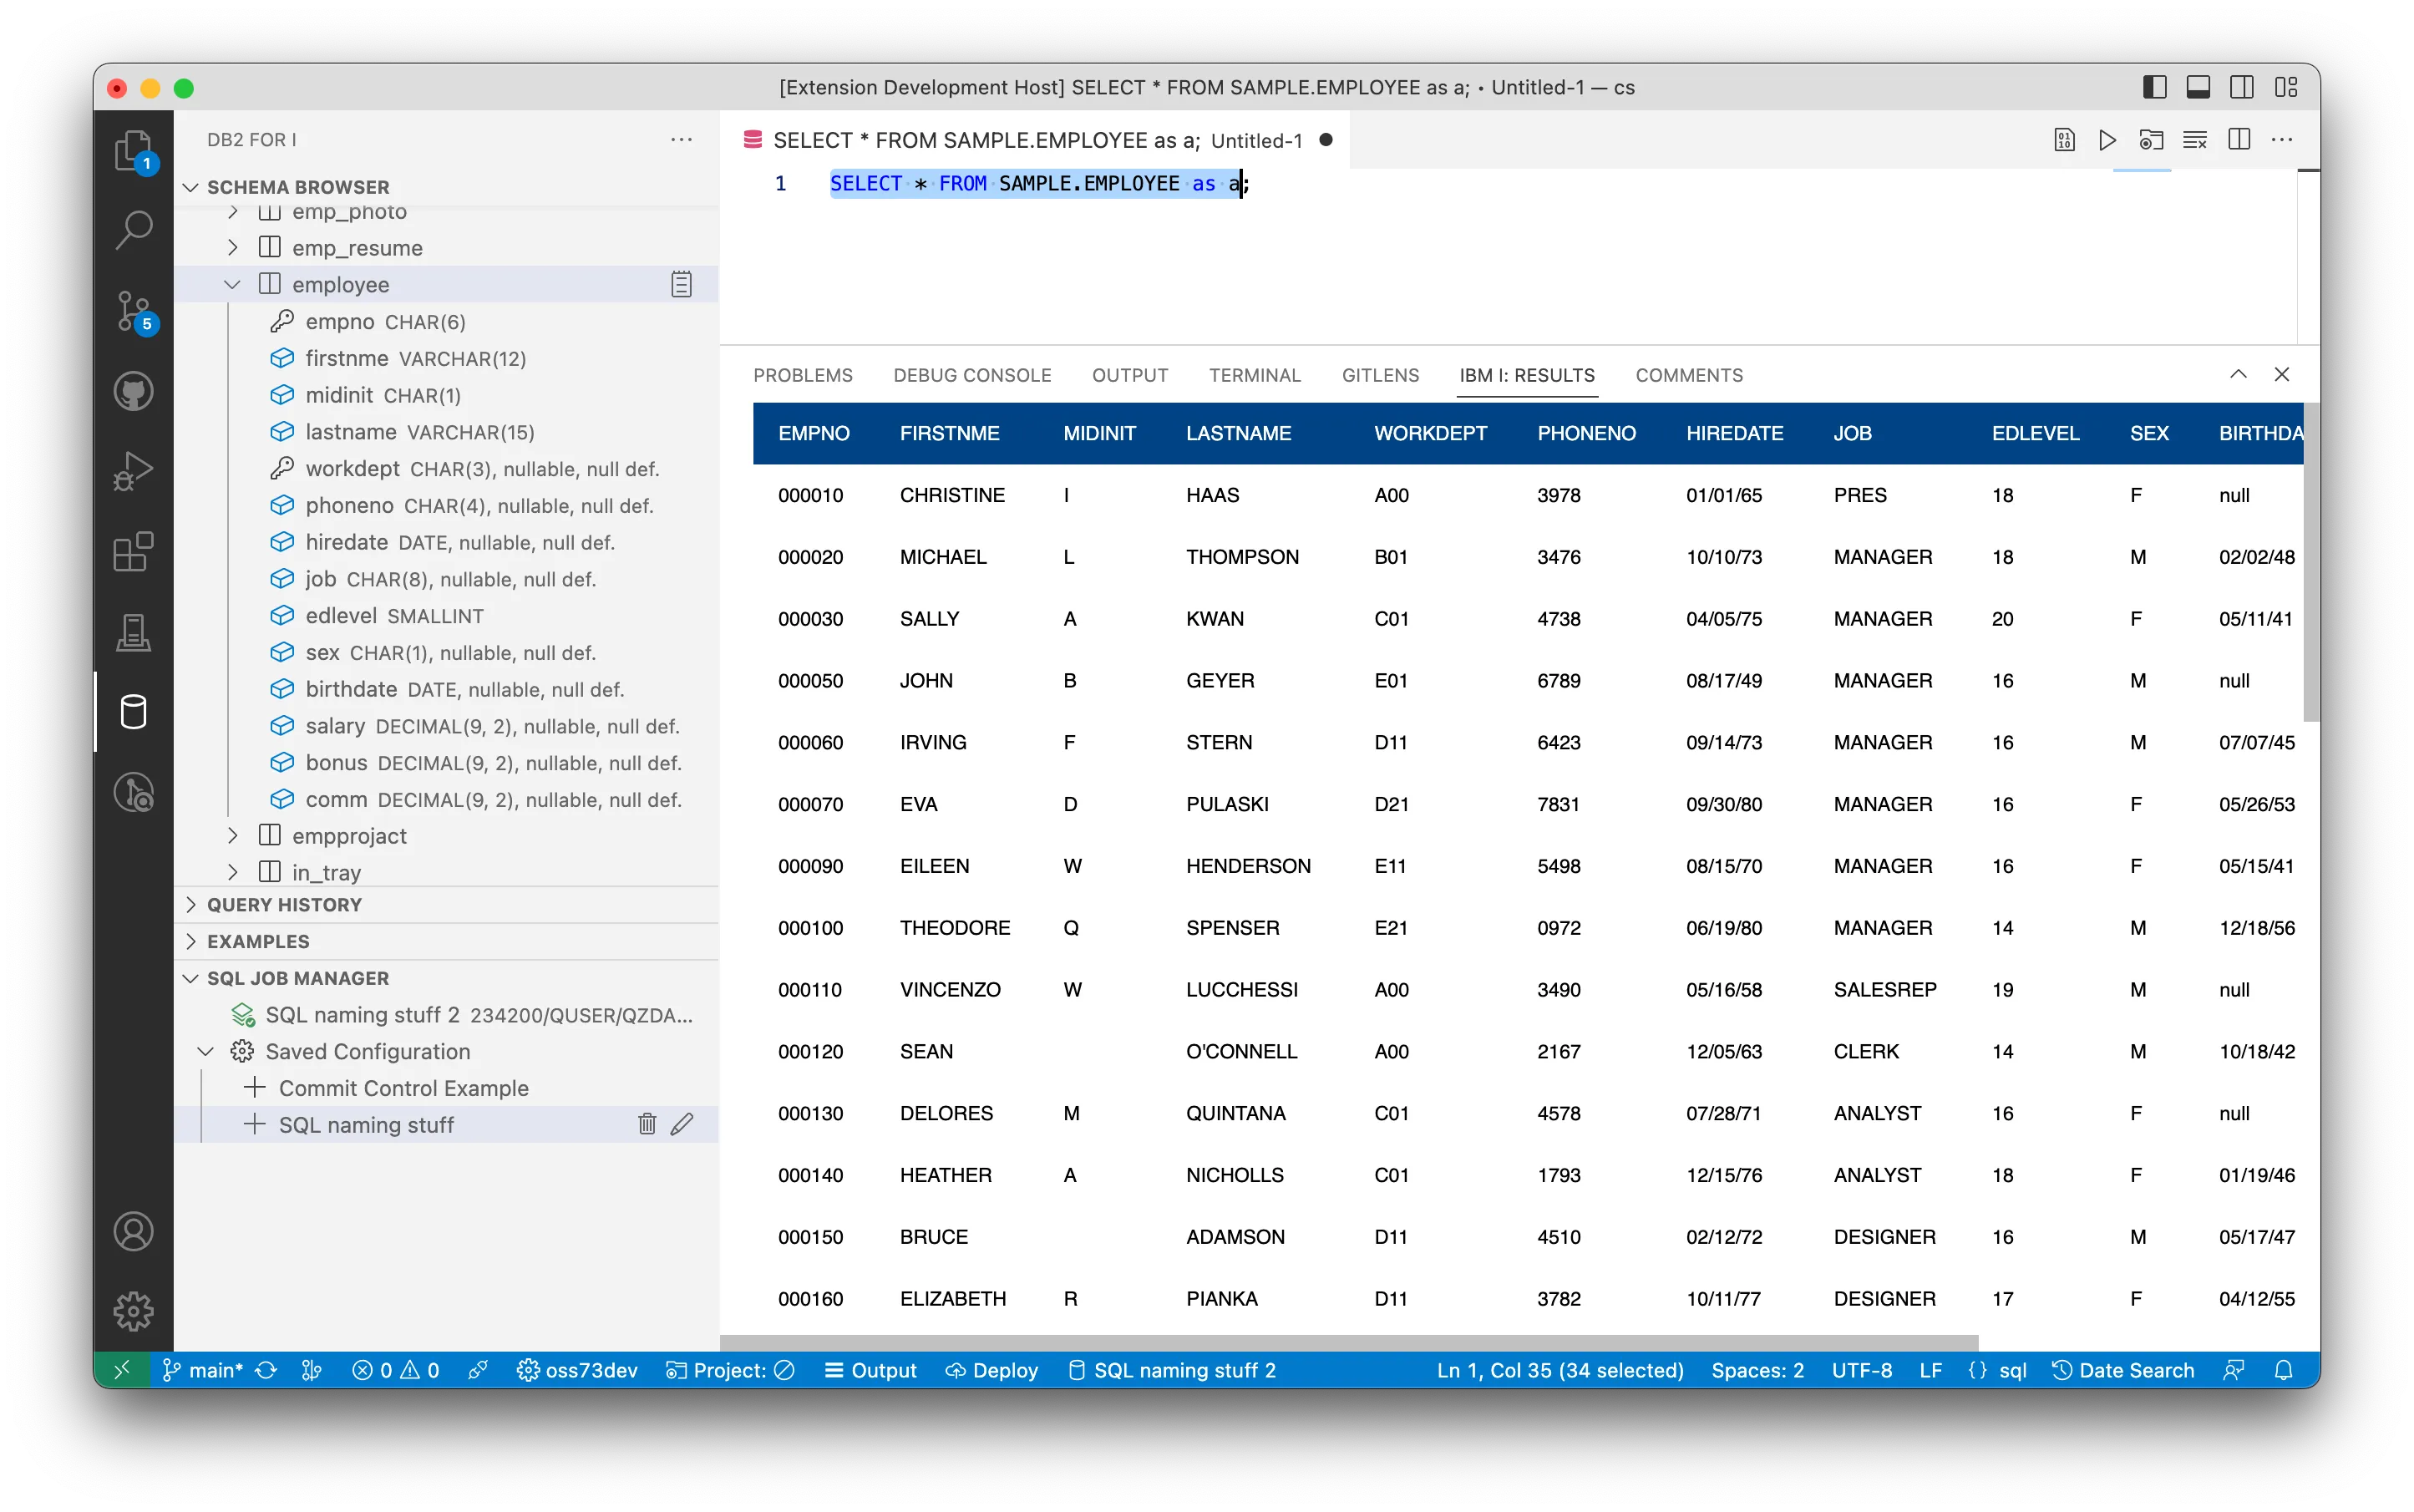
After you have an SQL file open, you can either:
- Move your cursor onto the statement you want to execute and:
- use the play button in the top right to execute
- use the shortcut (control / command + R) to execute the statement
The result set will appear below the statement. As your scroll through the result set, more data will load.
SQL statements are executed using the active job selected in the SQL Job Manager view.
SQL Prefixes
SQL provided by Db2 for i allows you to run CL commands in a script. Additionally there are json, csv, sql, udtf, and rpg prefixes, which will open the result set in the chosen format.
-- Result set as normal tableselect * from sample.employee;
-- Result set as JSON (will open in a new file)json: select * from sample.employee;
-- Result set as CSV (will open in a new file)csv: select * from sample.employee;
-- Result set as SQL insert statements (will open in a new file)sql: select * from sample.employee;
-- User-defined table function based on result set columns (will open in a new file)udtf: select * from toystore.staff;
-- RPG data structure based on result set columns (will open in a new file)rpg: select * from sample.employee;
-- Run CL commands (output is directed to "Db2 for i: Results" view)cl: dspffd sample/employee
Updatable Cells
It’s possible to update directly from running a SQL statement. You can use the update: prefix with a select statement to make the result set updatable. This will allow you to edit the data in the result set and then save the changes back to the database. Use Shift+Enter to set a field to null.
A fully qualified table name is required for the fields to be editable.
update: select * from sample.employee;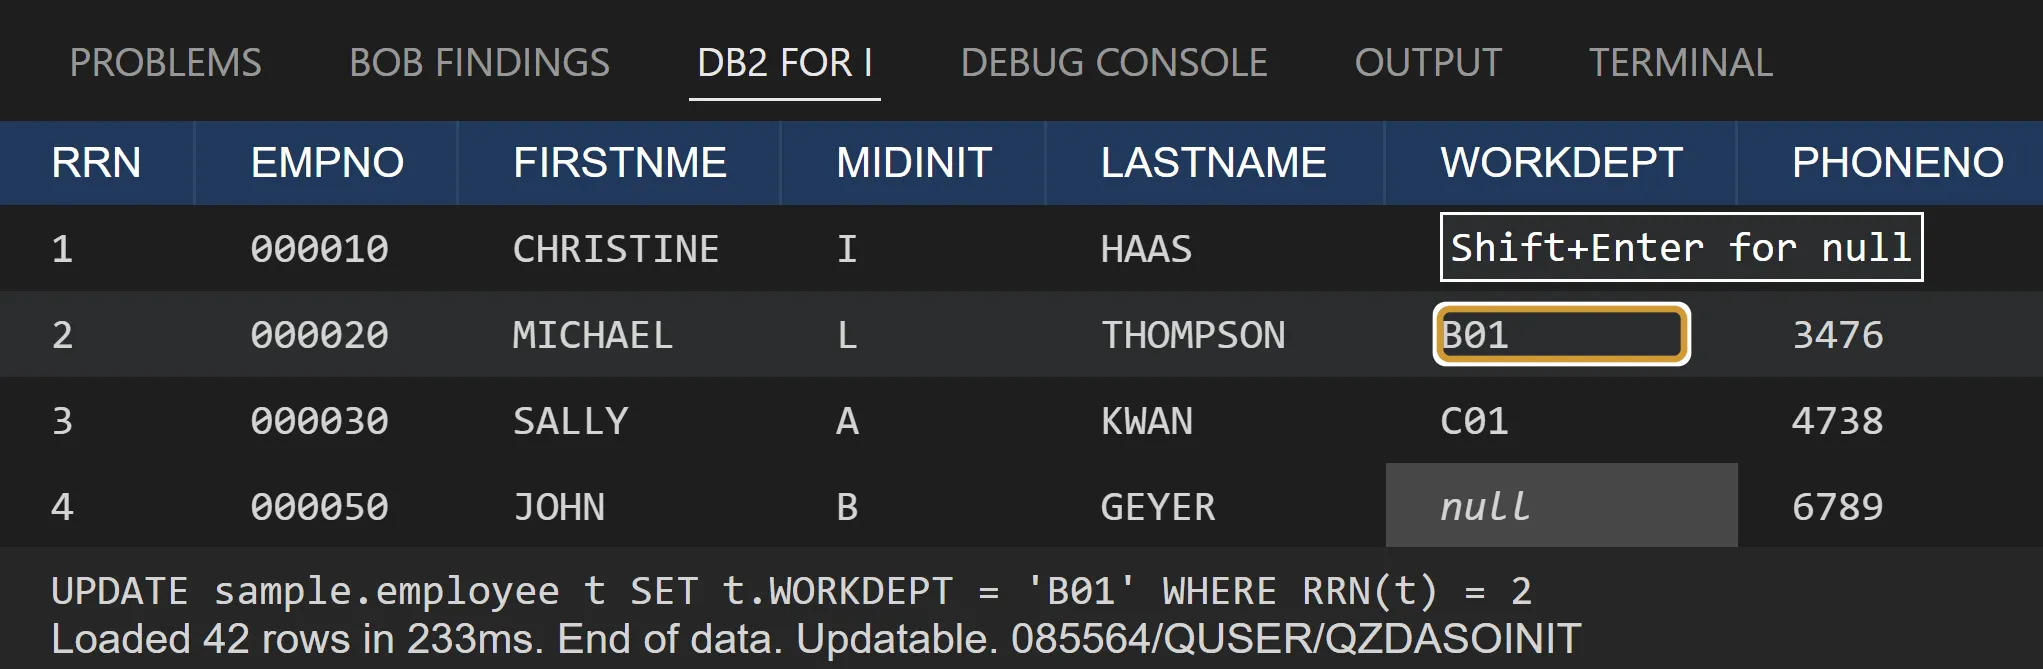
Binding Parameters
It is possible to bind to SQL parameters inside of SQL statements - both ? markers and named parameters (e.g. :param1) are supported - by using the bind: prefix. bind: is followed by a list of strings or numbers, either space or comma separated. When executing the prefix, it will find the most previous statement in the document to bind to.
select * from employee where empno = ?;
bind: '000010';bind: '000020';
select * from employee where empno = ? and workdept = ?;
bind: '000010', 'A00';bind: '000020', 'A00';
Statement History
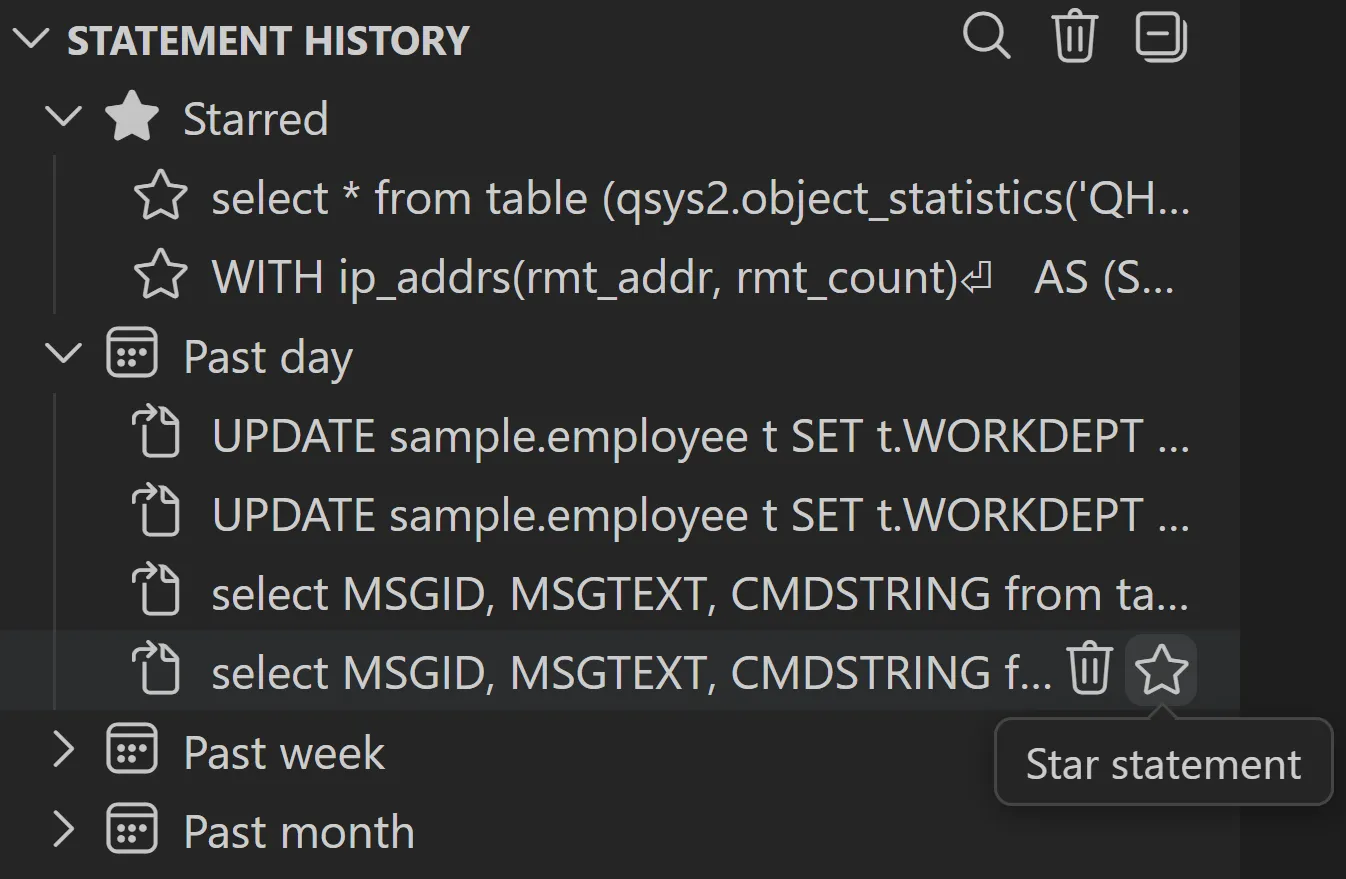
When you execute an SQL statement, it will be prepended to your Statement History view. For any commonly used SQL statements, you can star them to make them easily readily accessible.
Syntax Checking
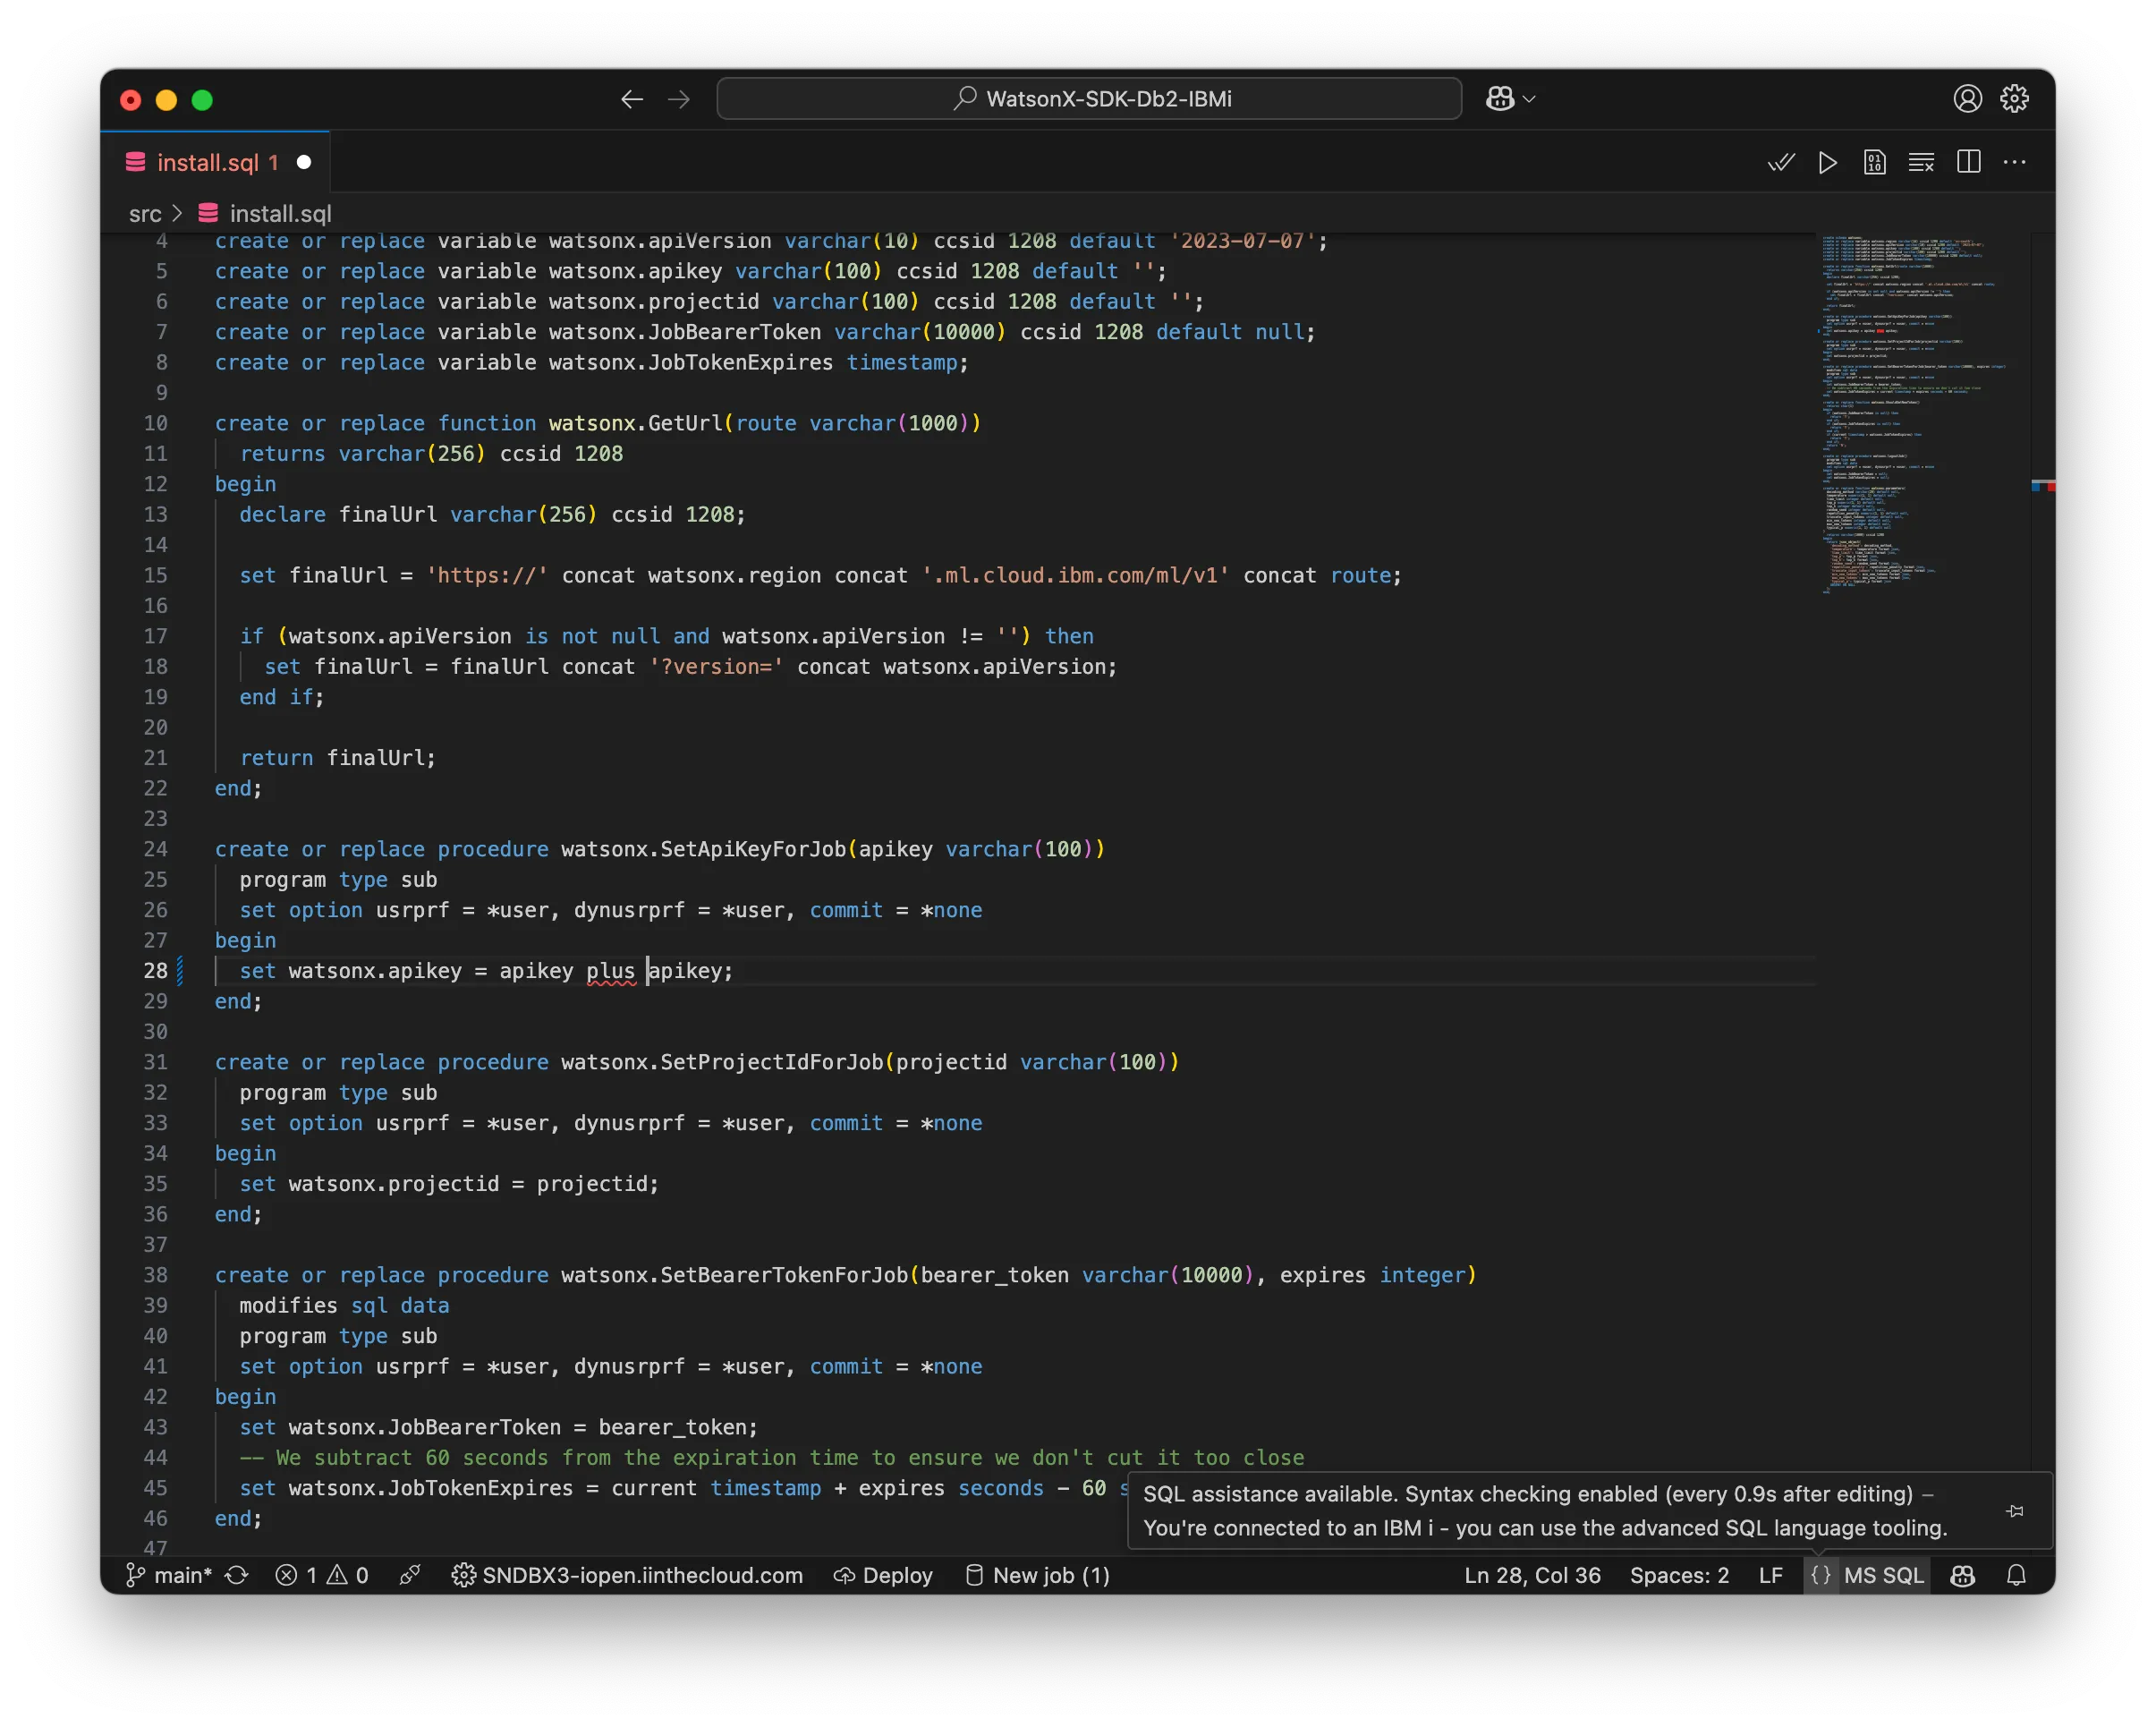
When connected to an IBM i, the syntax checker has the following options:
- as you edit an SQL file, the statement being edited will be syntax checked after a short period of time (enabled by default)
- when you open an SQL file, the entire document will be checked (disabled by default and has a limit of 200 statements in the document)
- when the ‘check syntax’ button is pressed, which is shown when an SQL document is open and are connected to a system (has the same statement limit)
The syntax checker configuration is available through the VS Code settings (and not the Connection Settings).
SQL Job Manager
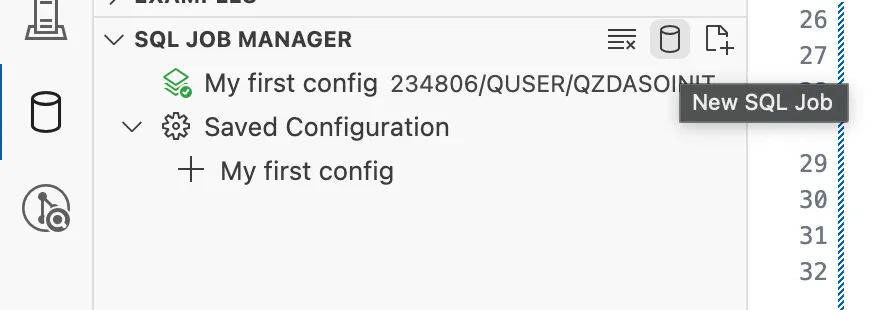
The SQL Job Manager view allows users to manage different SQL jobs, each with their own unique JDBC configuration. A new job can be created by clicking the database icon in the SQL Job Manager title bar. Or, if you have not created a new job before, there is a big button to do the same action.
Your active job will be marked with a highlighted icon. The active job is used for all SQL statement execution, including SQL that powers the Schema Browser, user-executed SQL statements, etc. You can change the active job by simply clicking the job you choose to use. You will see the highlighted icon change to indicate the active job.
Editing Job Configuration
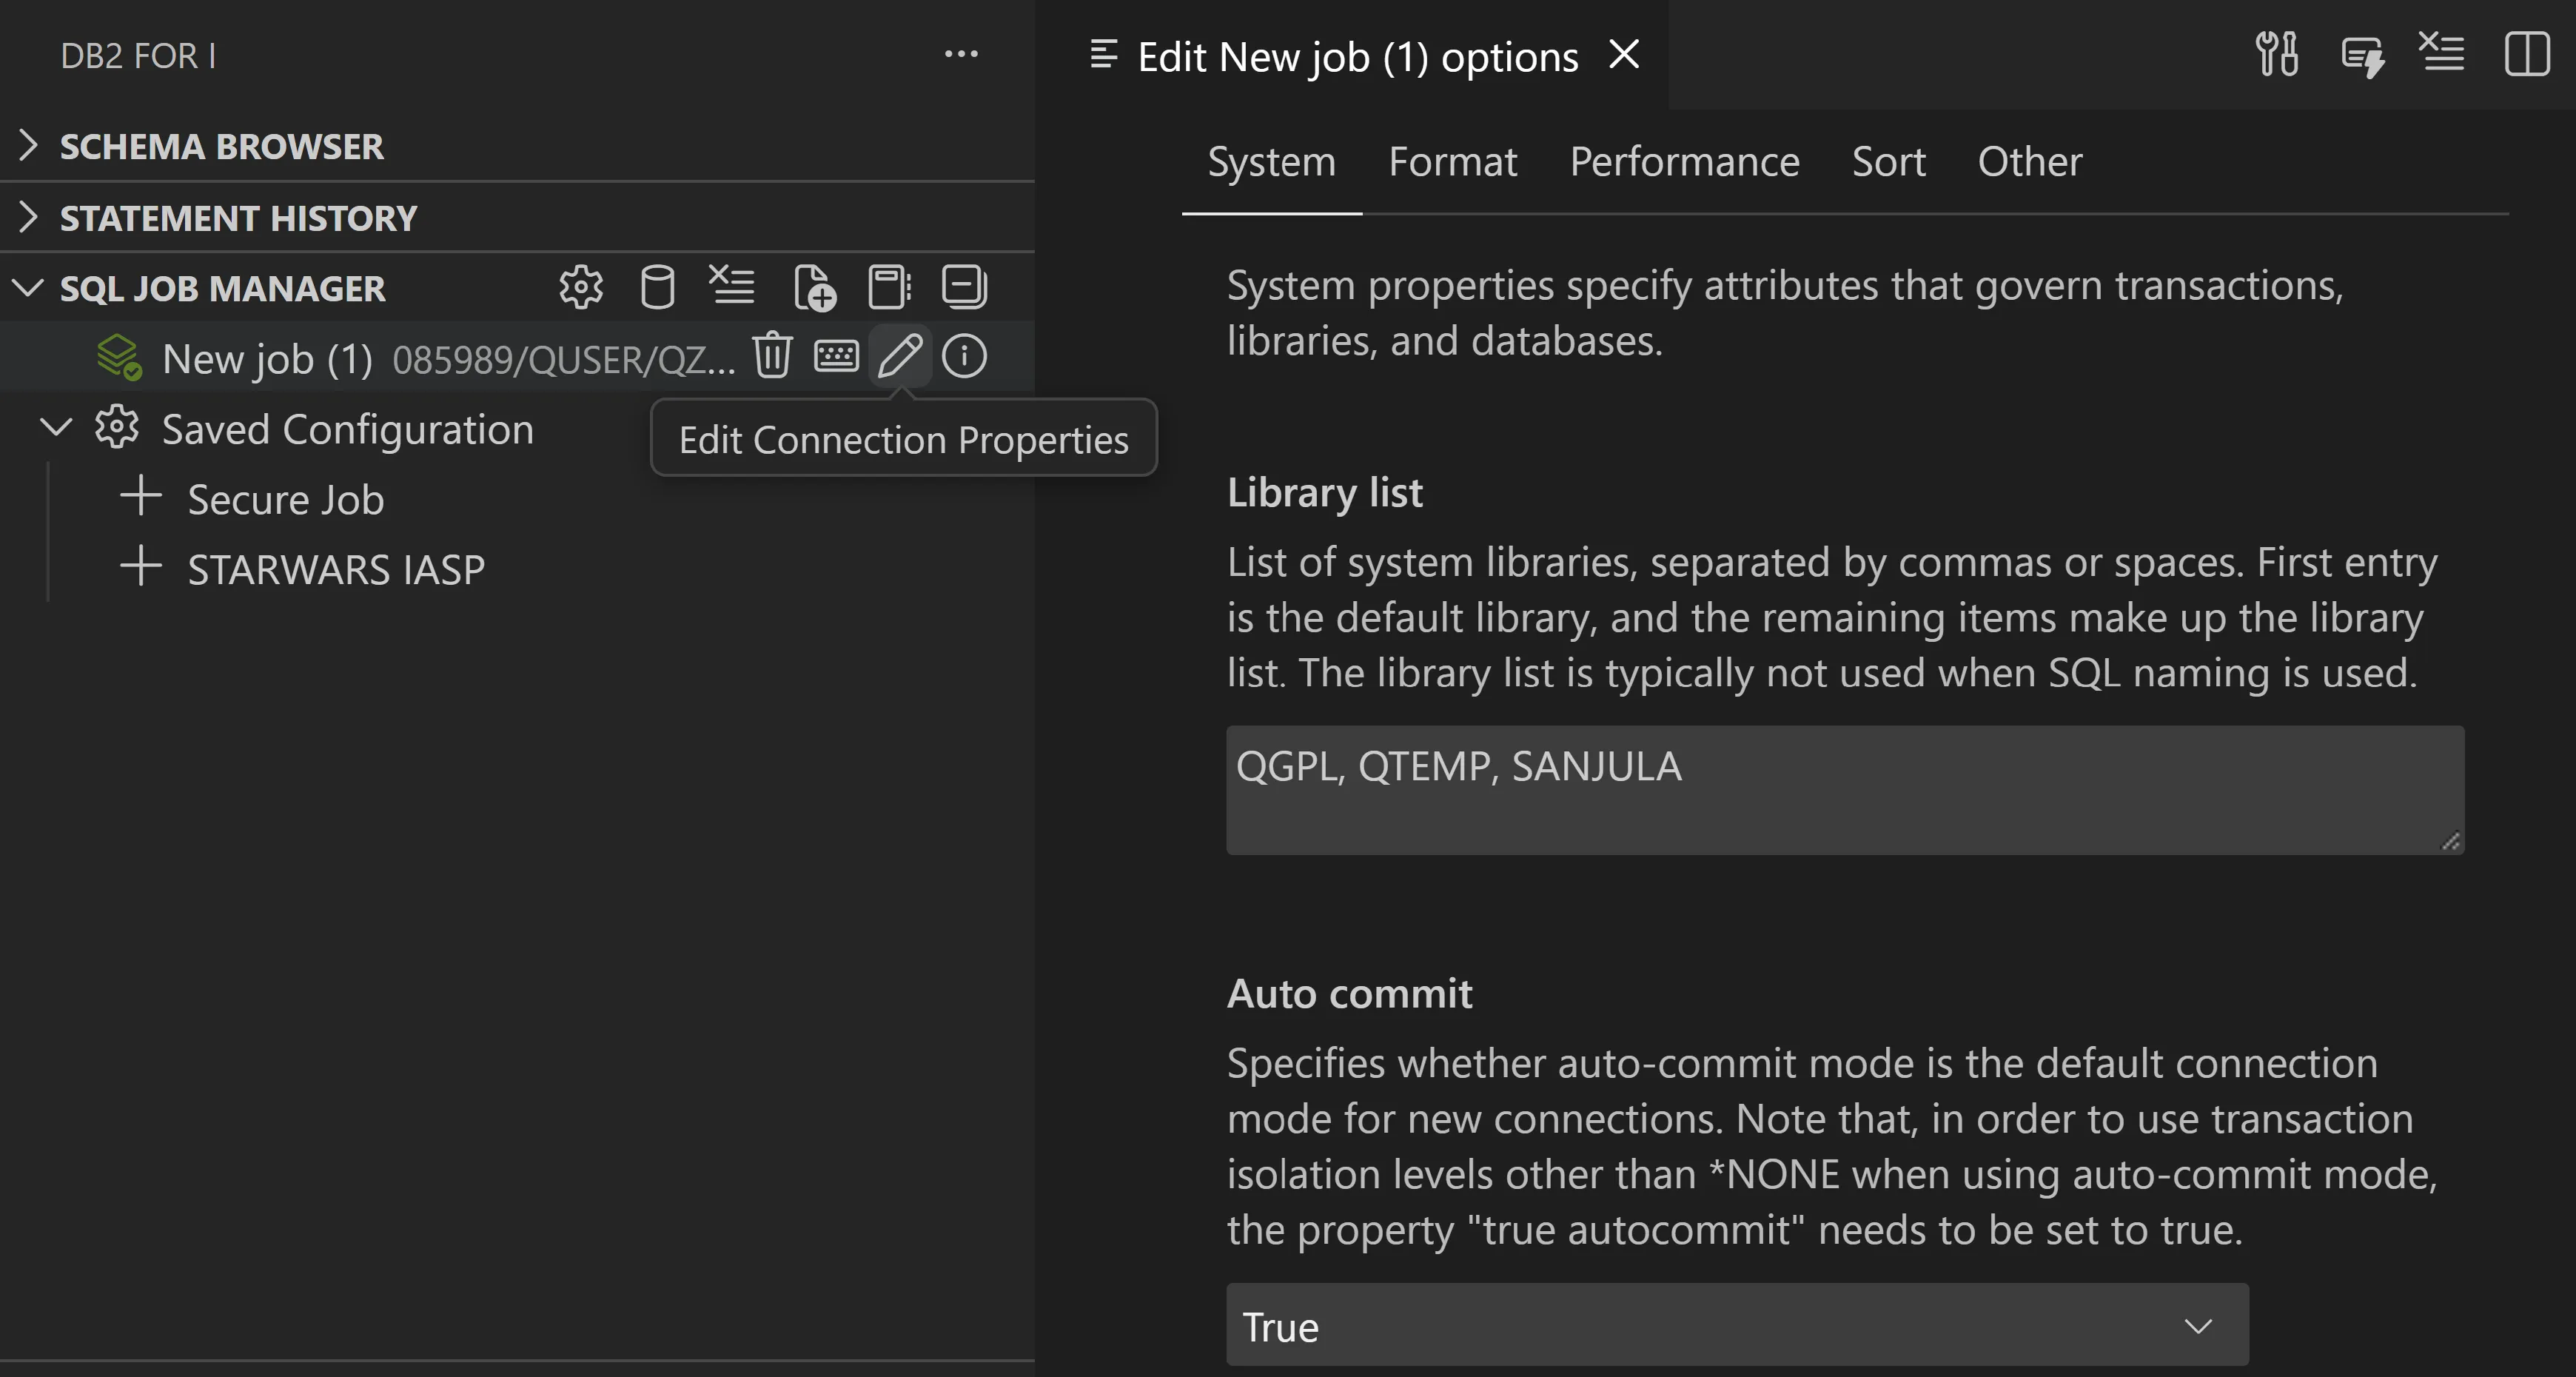
You can use the ‘Edit Connection Properties’ inline button (pencil icon) on any job to edit the JDBC properties. When the ‘Apply Changes’ button is pressed, any changes are saved and the job is restarted to fully apply the changes.
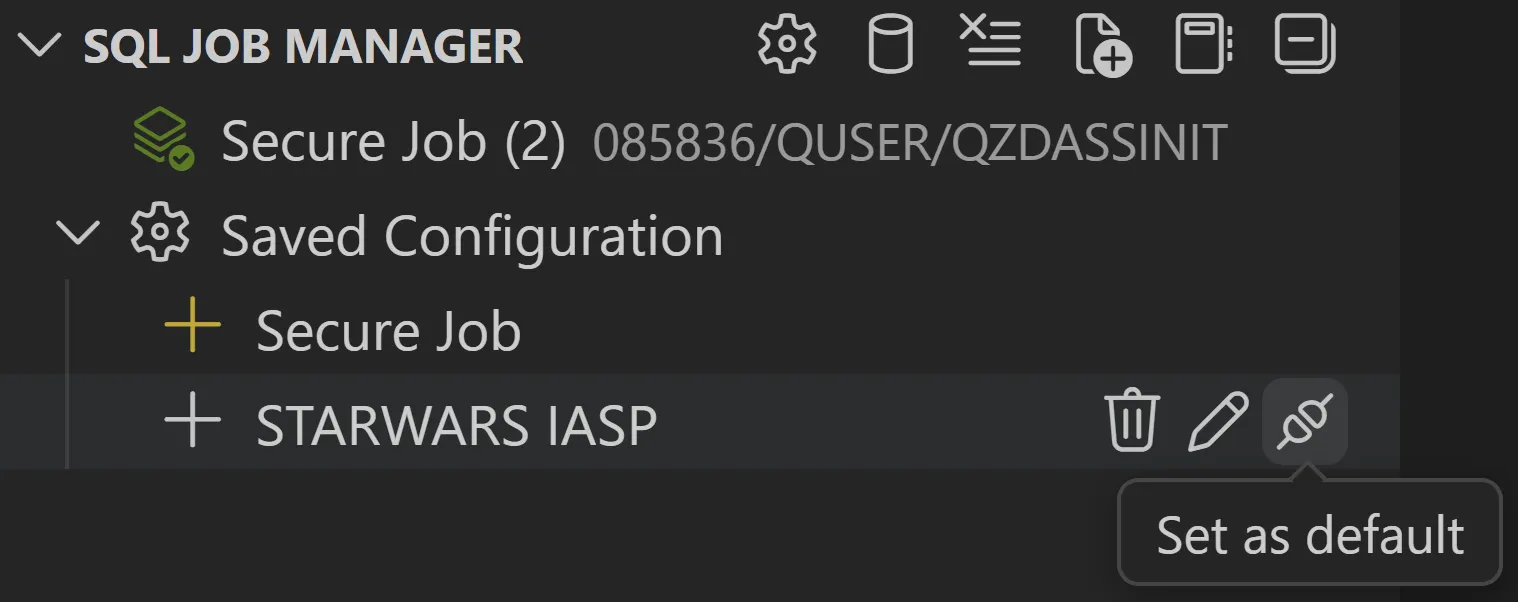
You are able to right-click on any job to save those job settings, allowing it to be easily reused. This is done using the ‘Save settings to config’ right-click action which will prompt you to enter a name for the configuration. Once saved, you will see a Saved Configuration folder appear, with all your saved configs. Clicking on a saved config will launch a new job with those pre-defined settings. You can use the pencil icon on any saved configuration to edit it. Lastly, a saved config can also be set as your default (which will be highlighted in yellow) so that any new jobs which are spun up will default to these job settings.
You also have the ability to set cross system default connection properties which serve as a fallback when no saved config is set as the default. For example, if you prefer to use sql rather than system naming across all system, this can be set here.
Schema Browser
The Db2 for i extension has view called Schema Browser which allows the user to add existing schemas to the list and will allow them to browse existing database objects.
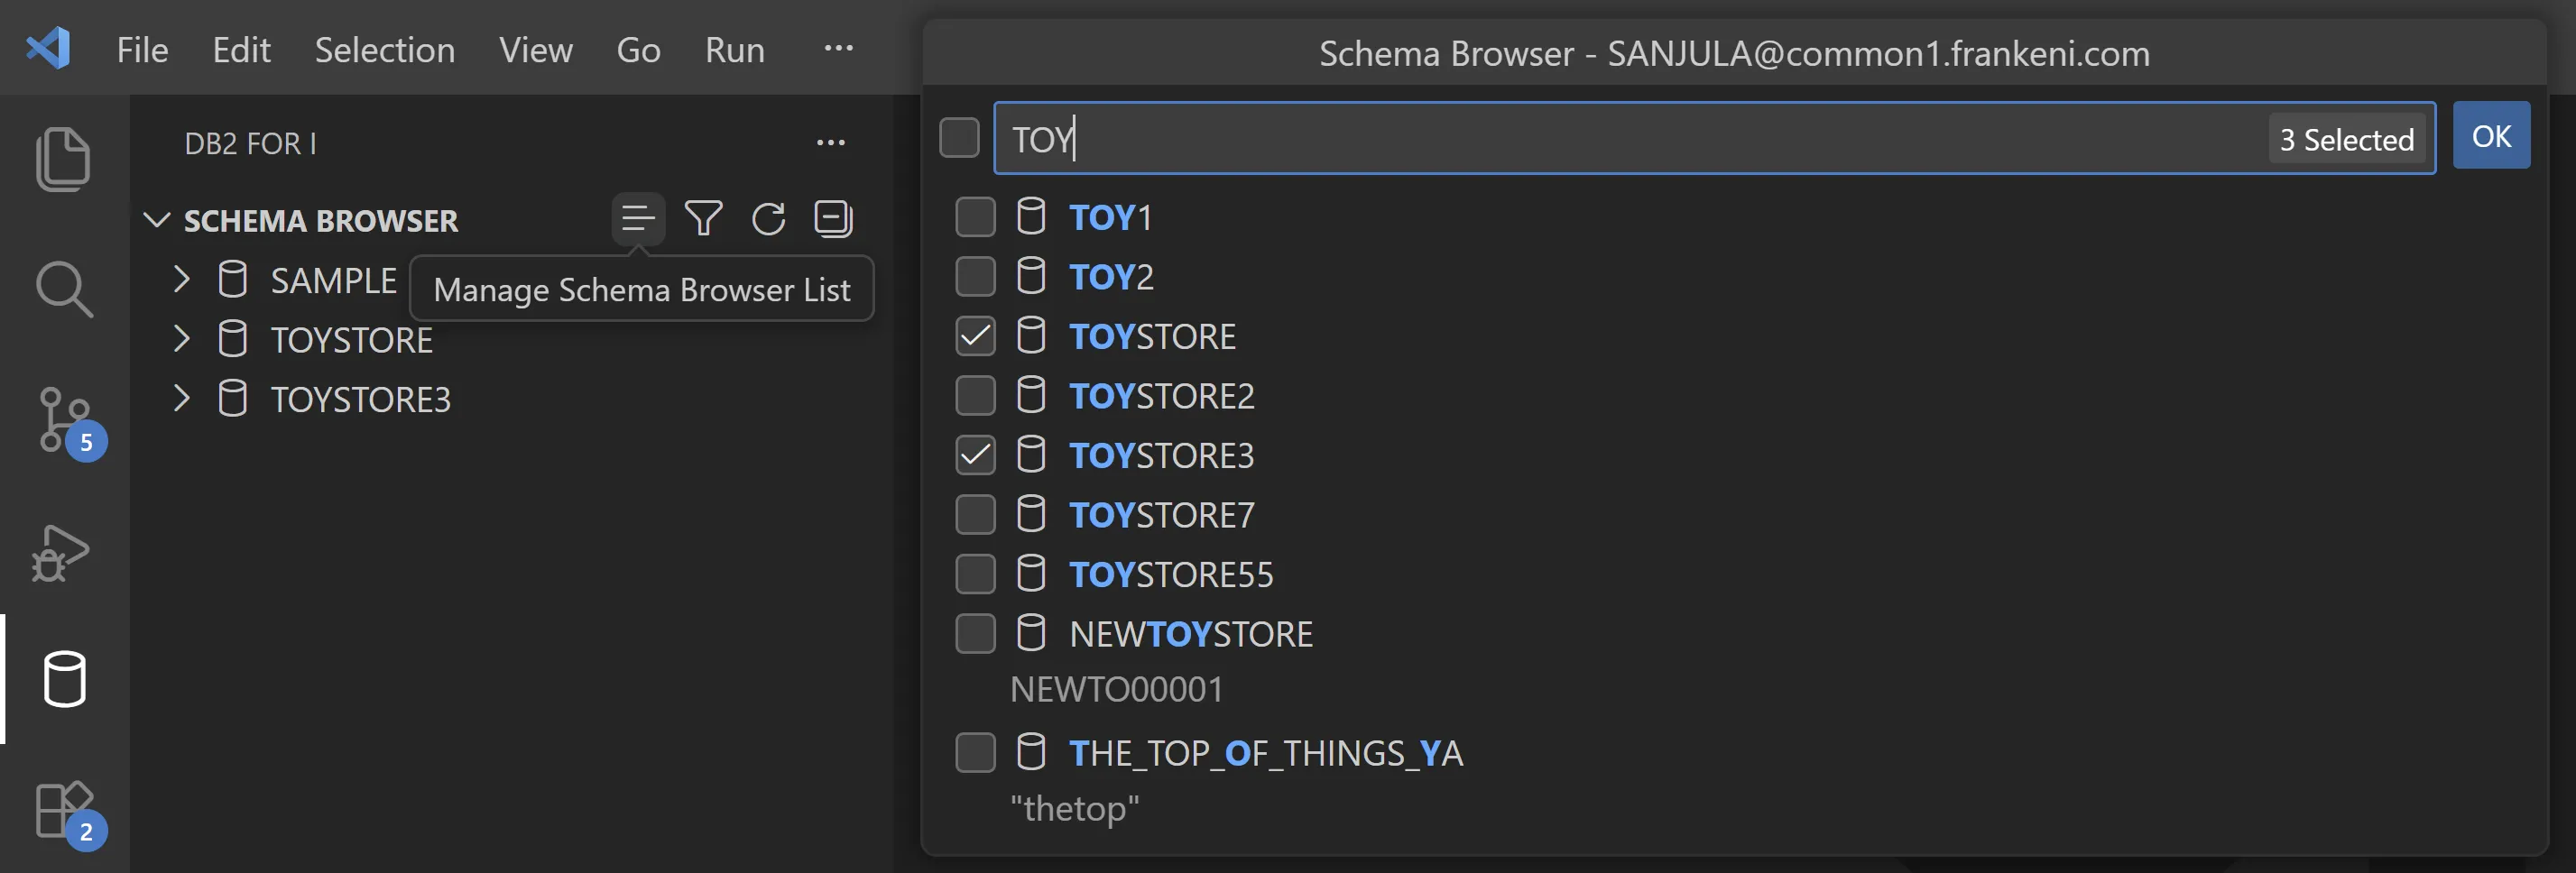
Once you have your desired schemas added, you can browse your database objects based on type. You can use the ‘Filter Database Object Types’ option to filter which types are are shown. You can also right-click on SQL objects to see more actions (each SQL object type may have unique actions).

Viewing Table Contents
If you are using the Schema Browser to browse objects, you are able to use the ‘View contents’ icon when hovering over a table, view, or alias to cause a basic SQL select statement to be generated and executed.
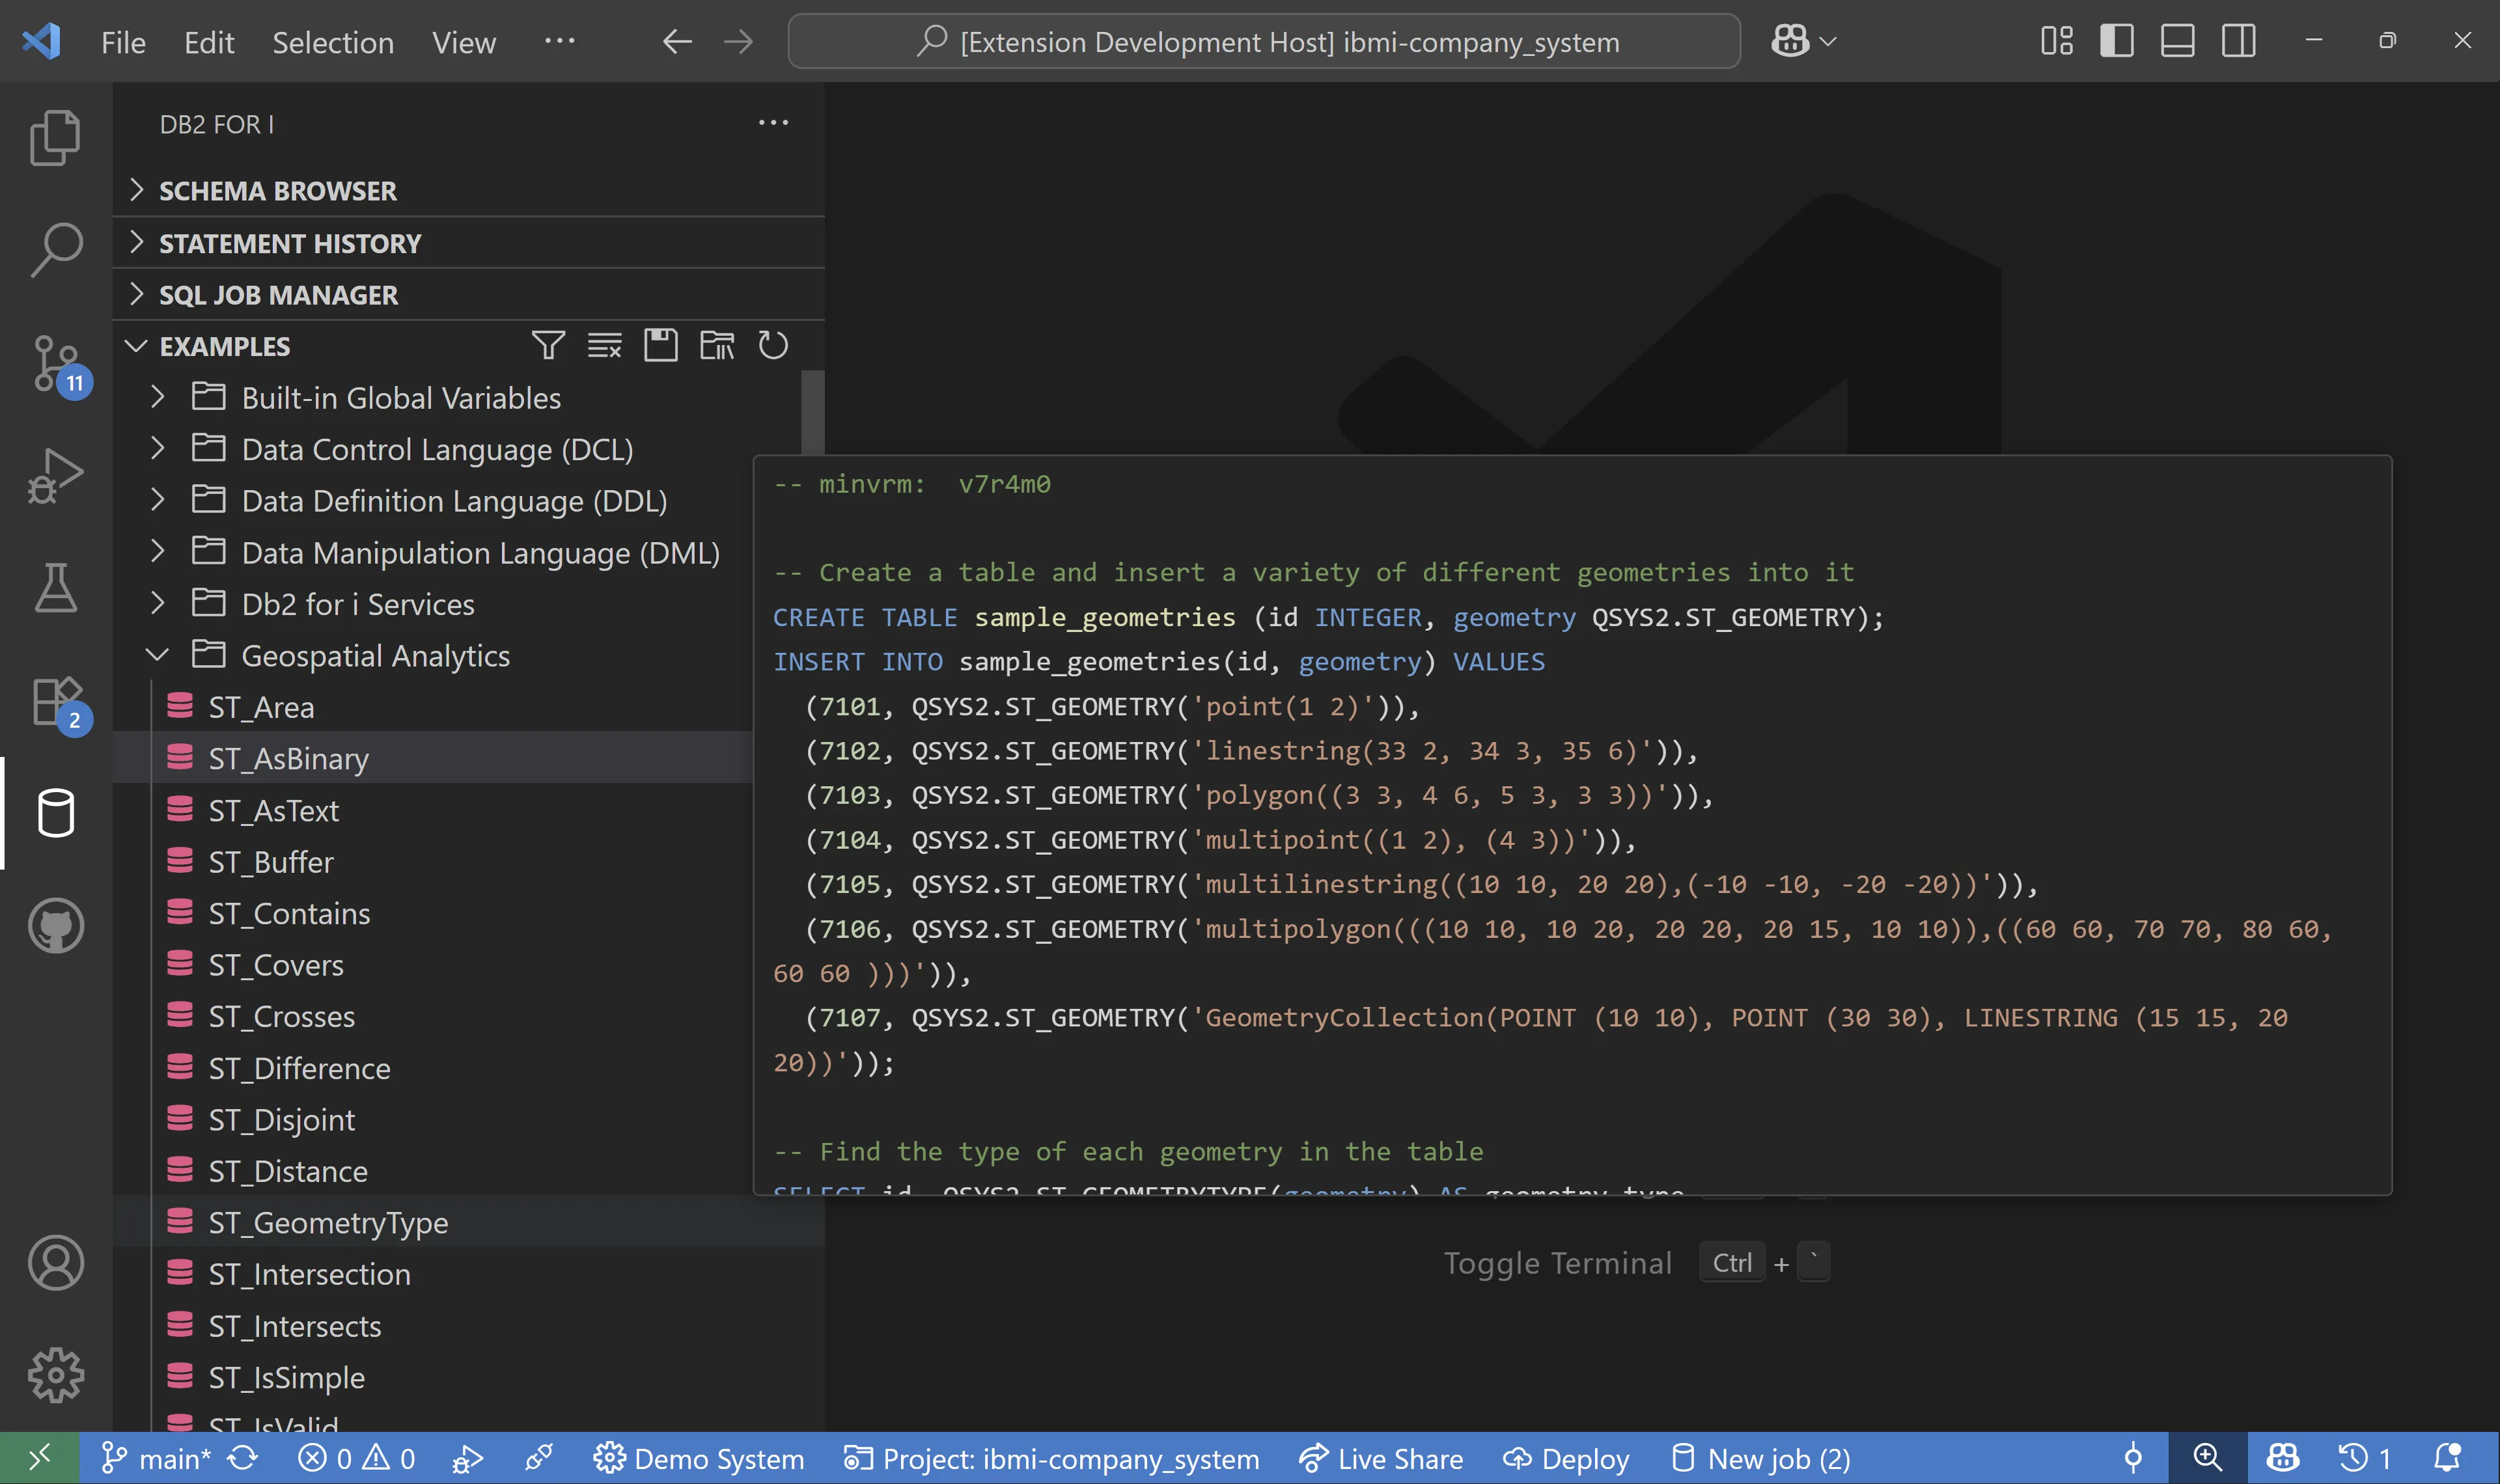
SQL Examples
The Examples view provides users with a set of SQL example scripts that can be used as a learning tool or as a starting point for their own SQL scripts. These examples are grouped into categories to make it easy to find what you are looking for. You can hover over any example to get a preview of the SQL script or click on it to open a copy which you can freely edit.
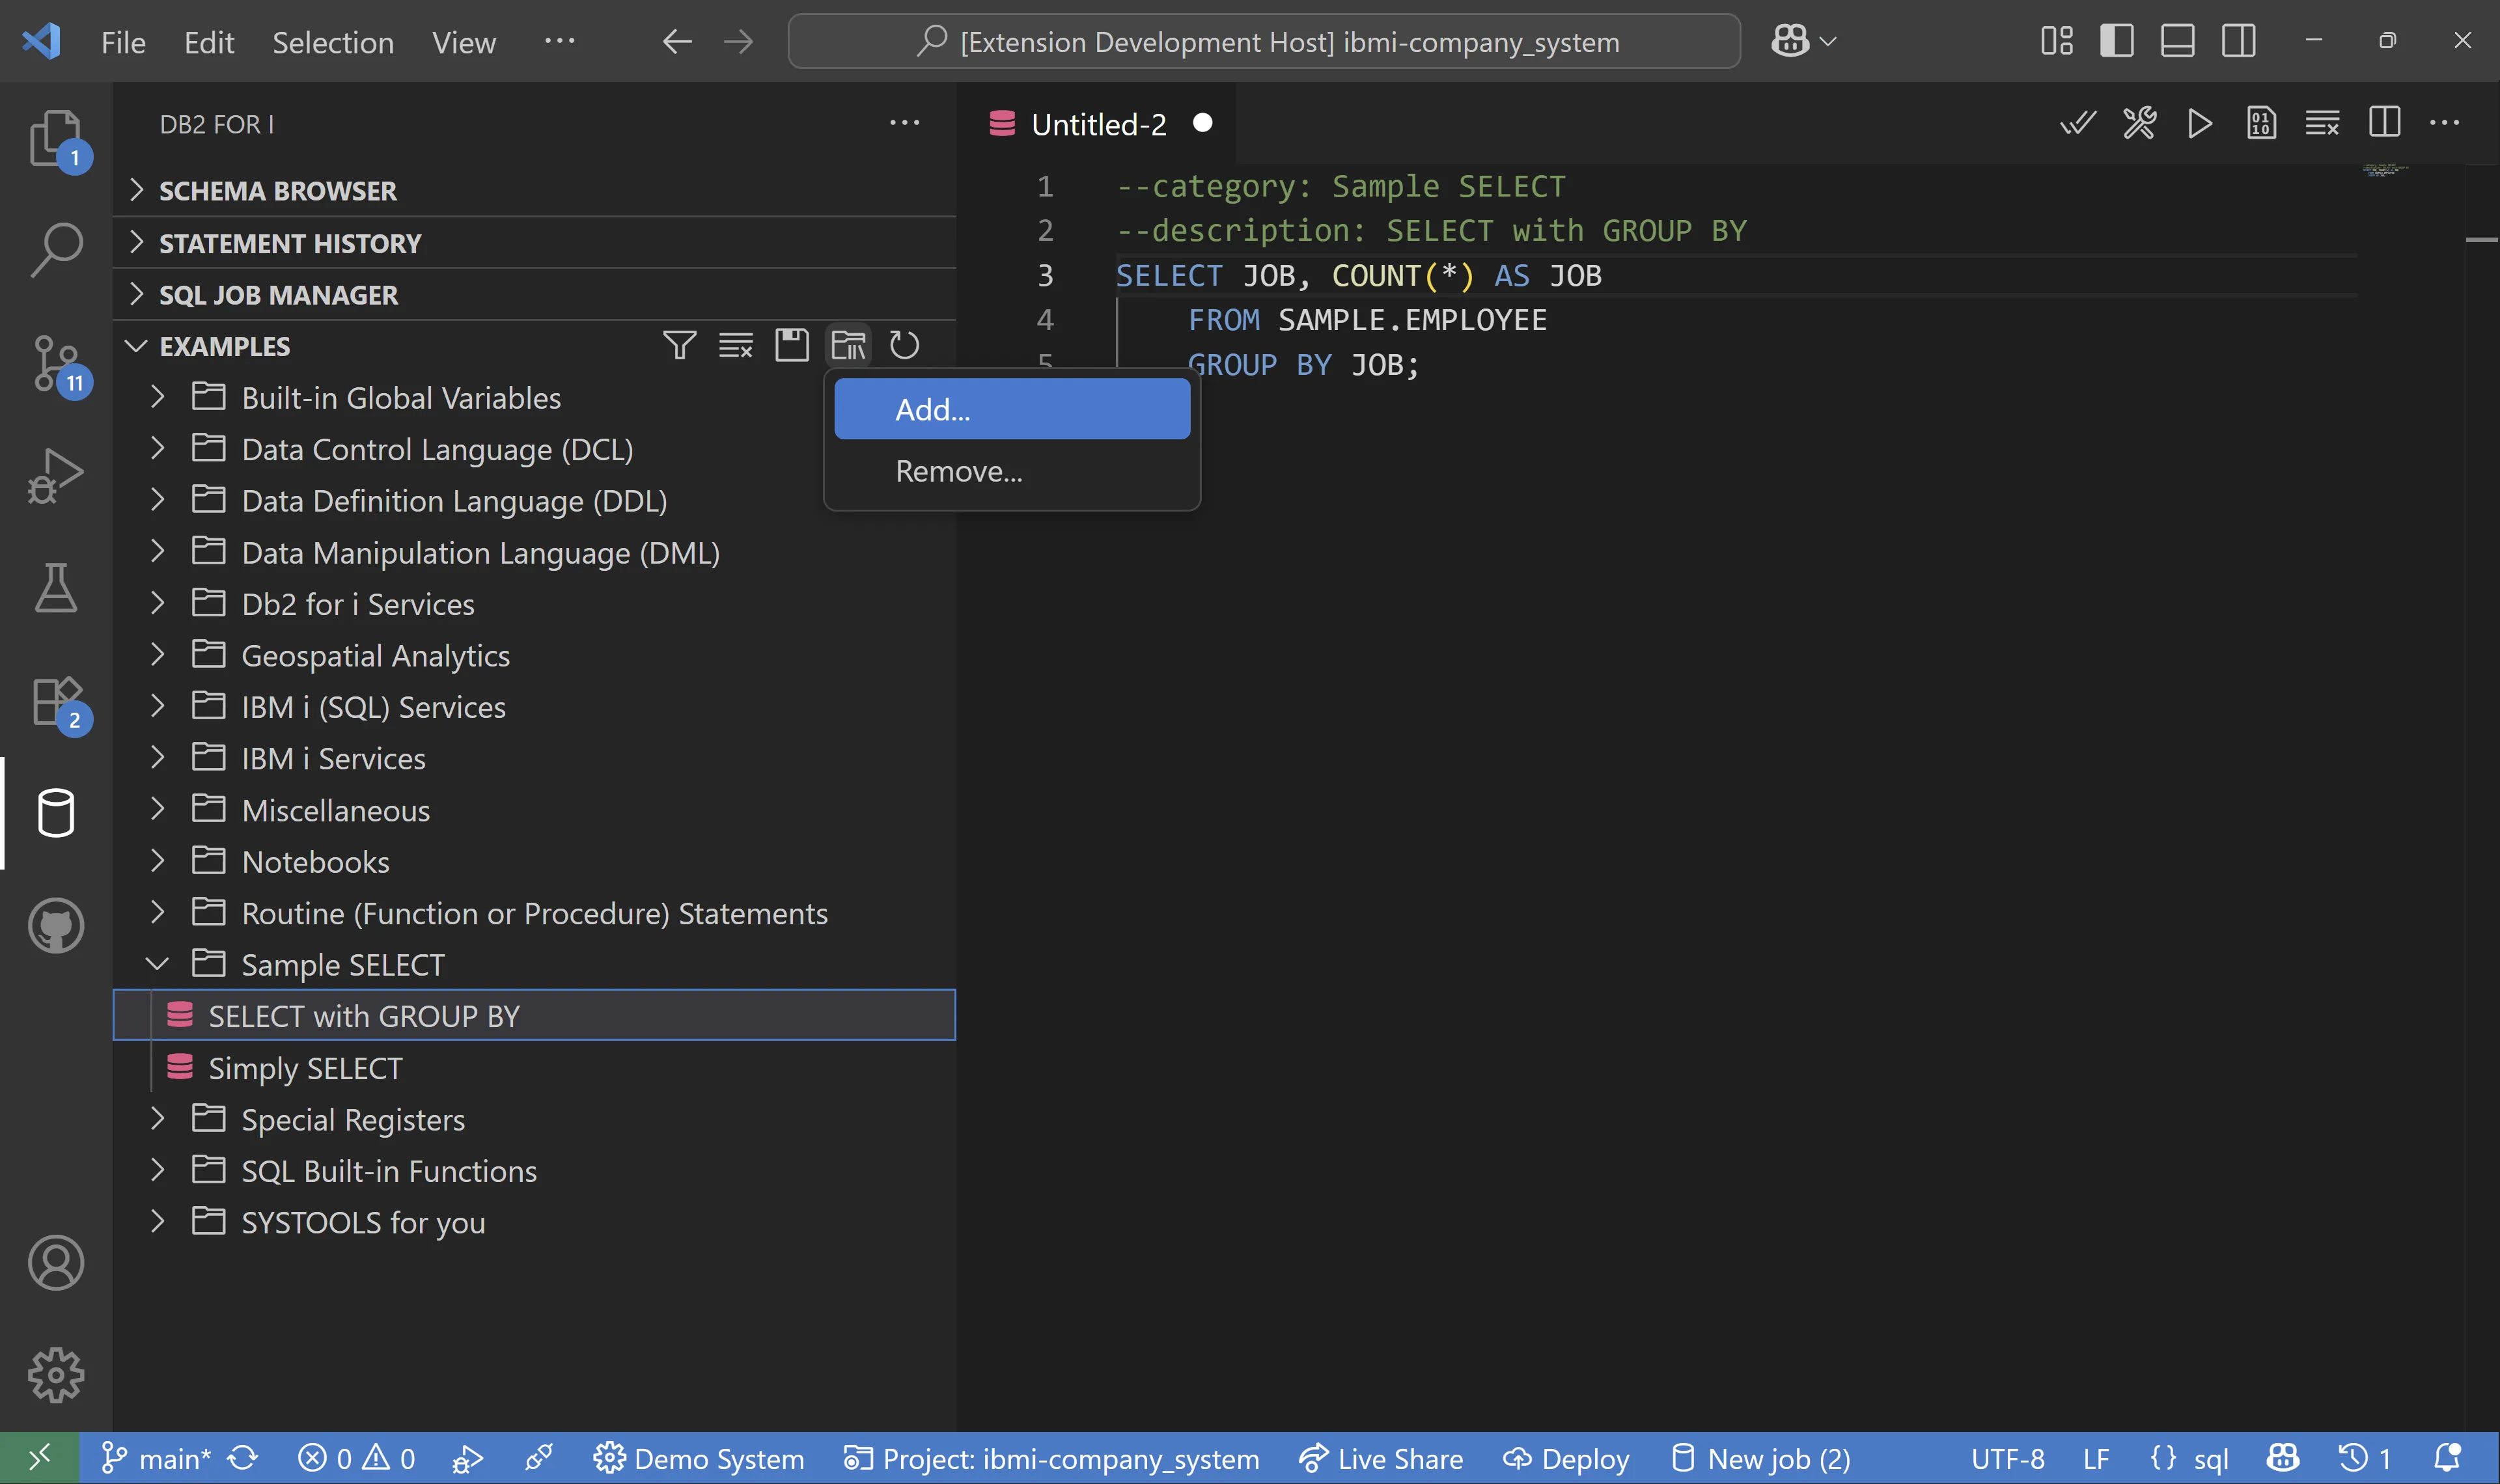
On top of the built-in examples, users can also add specific directories containing their own SQL examples using the Add... button under the Custom Examples Directories submenu on the Examples view. All SQL files in the specified directories and at most one subdirectory level deeper will be picked up. By default, the folder name will be the category and the file name will be the name of the example. This can be customized by optionally including a comment in the file with the tags category and description.
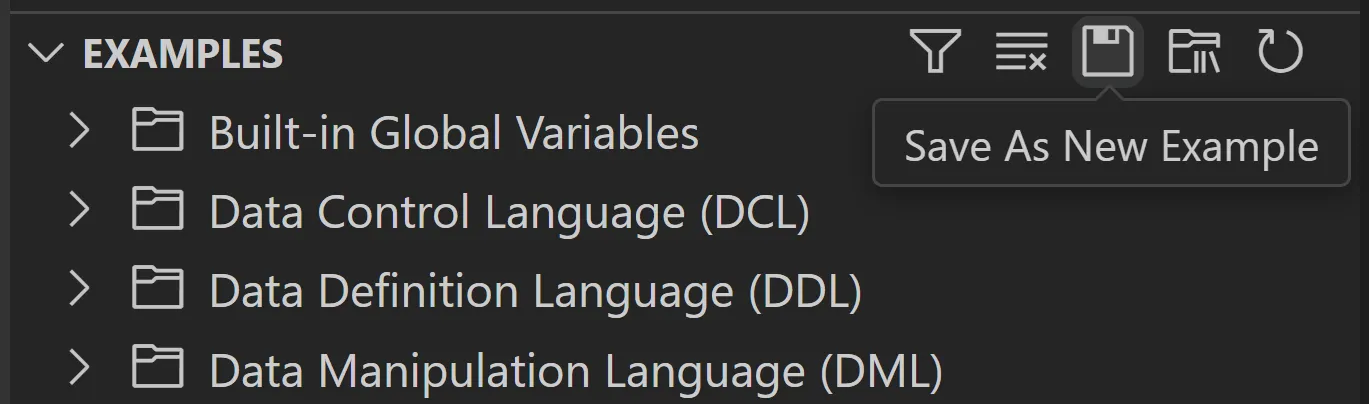
Once you have added a custom examples directory, you can quickly save new examples to that directory using the Save As New Example button in the Examples view.
SQL Error Logging Facility (SELF)
SQL Error Logging Facility (SELF) offers a comprehensive view that can help users understand specific SQL errors or warnings. The SELF view can be accessed through the IBM i panel next to the Results View.
Additional documentation of SELF can be found here

Each item in the SELF view is for a specific SQLCODE which is displayed in parenthesis. The SQLCODE tracks the actual error or warning triggered by a given SQL statement.
- An error SQLCODE must be preceded by a single minus sign (’-’).
- A warning SQLCODE can be preceded by an optional plus sign (’+’).
When an item is expanded or hovered over, information about the SQLCODE is displayed such as the Job Name, Call Stack, Additional Details, and the SQL statement. The counter on the right of each item denotes the number of occurrences(🔥) of the specific SQLCODE . Once the number of occurrences for a given code is greater than 100, we display 💯.
Enabling SELF in VSCode
To capture SQL errors or warnings, enable the SELF Default in your VSCode settings. This will be the Default SYSIBMADM.SELFCODES global variable for all jobs. By default, the SELFCODES level is set to *NONE.
- *ERROR specifies all SQLCODEs that are error conditions (negative values).
- *WARN specifies all SQLCODEs that are warning conditions (positive values).
- *ALL specifies all SQLCODEs that are error or warning conditions.
- *NONE turns off SELF processing.

The SELF Level can also be set on a per job basis by right clicking on the active job in the SQL Job Manager
Auto Refresh
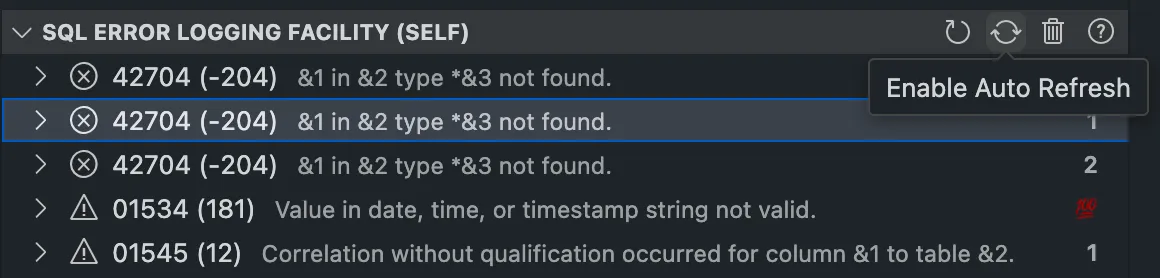
We added the option for users to configure Auto Refresh on the SELF view. When enabled, the SELF view will update on a constant interval (every 30 seconds). The SELF view can be cleared by clicking the trash icon.
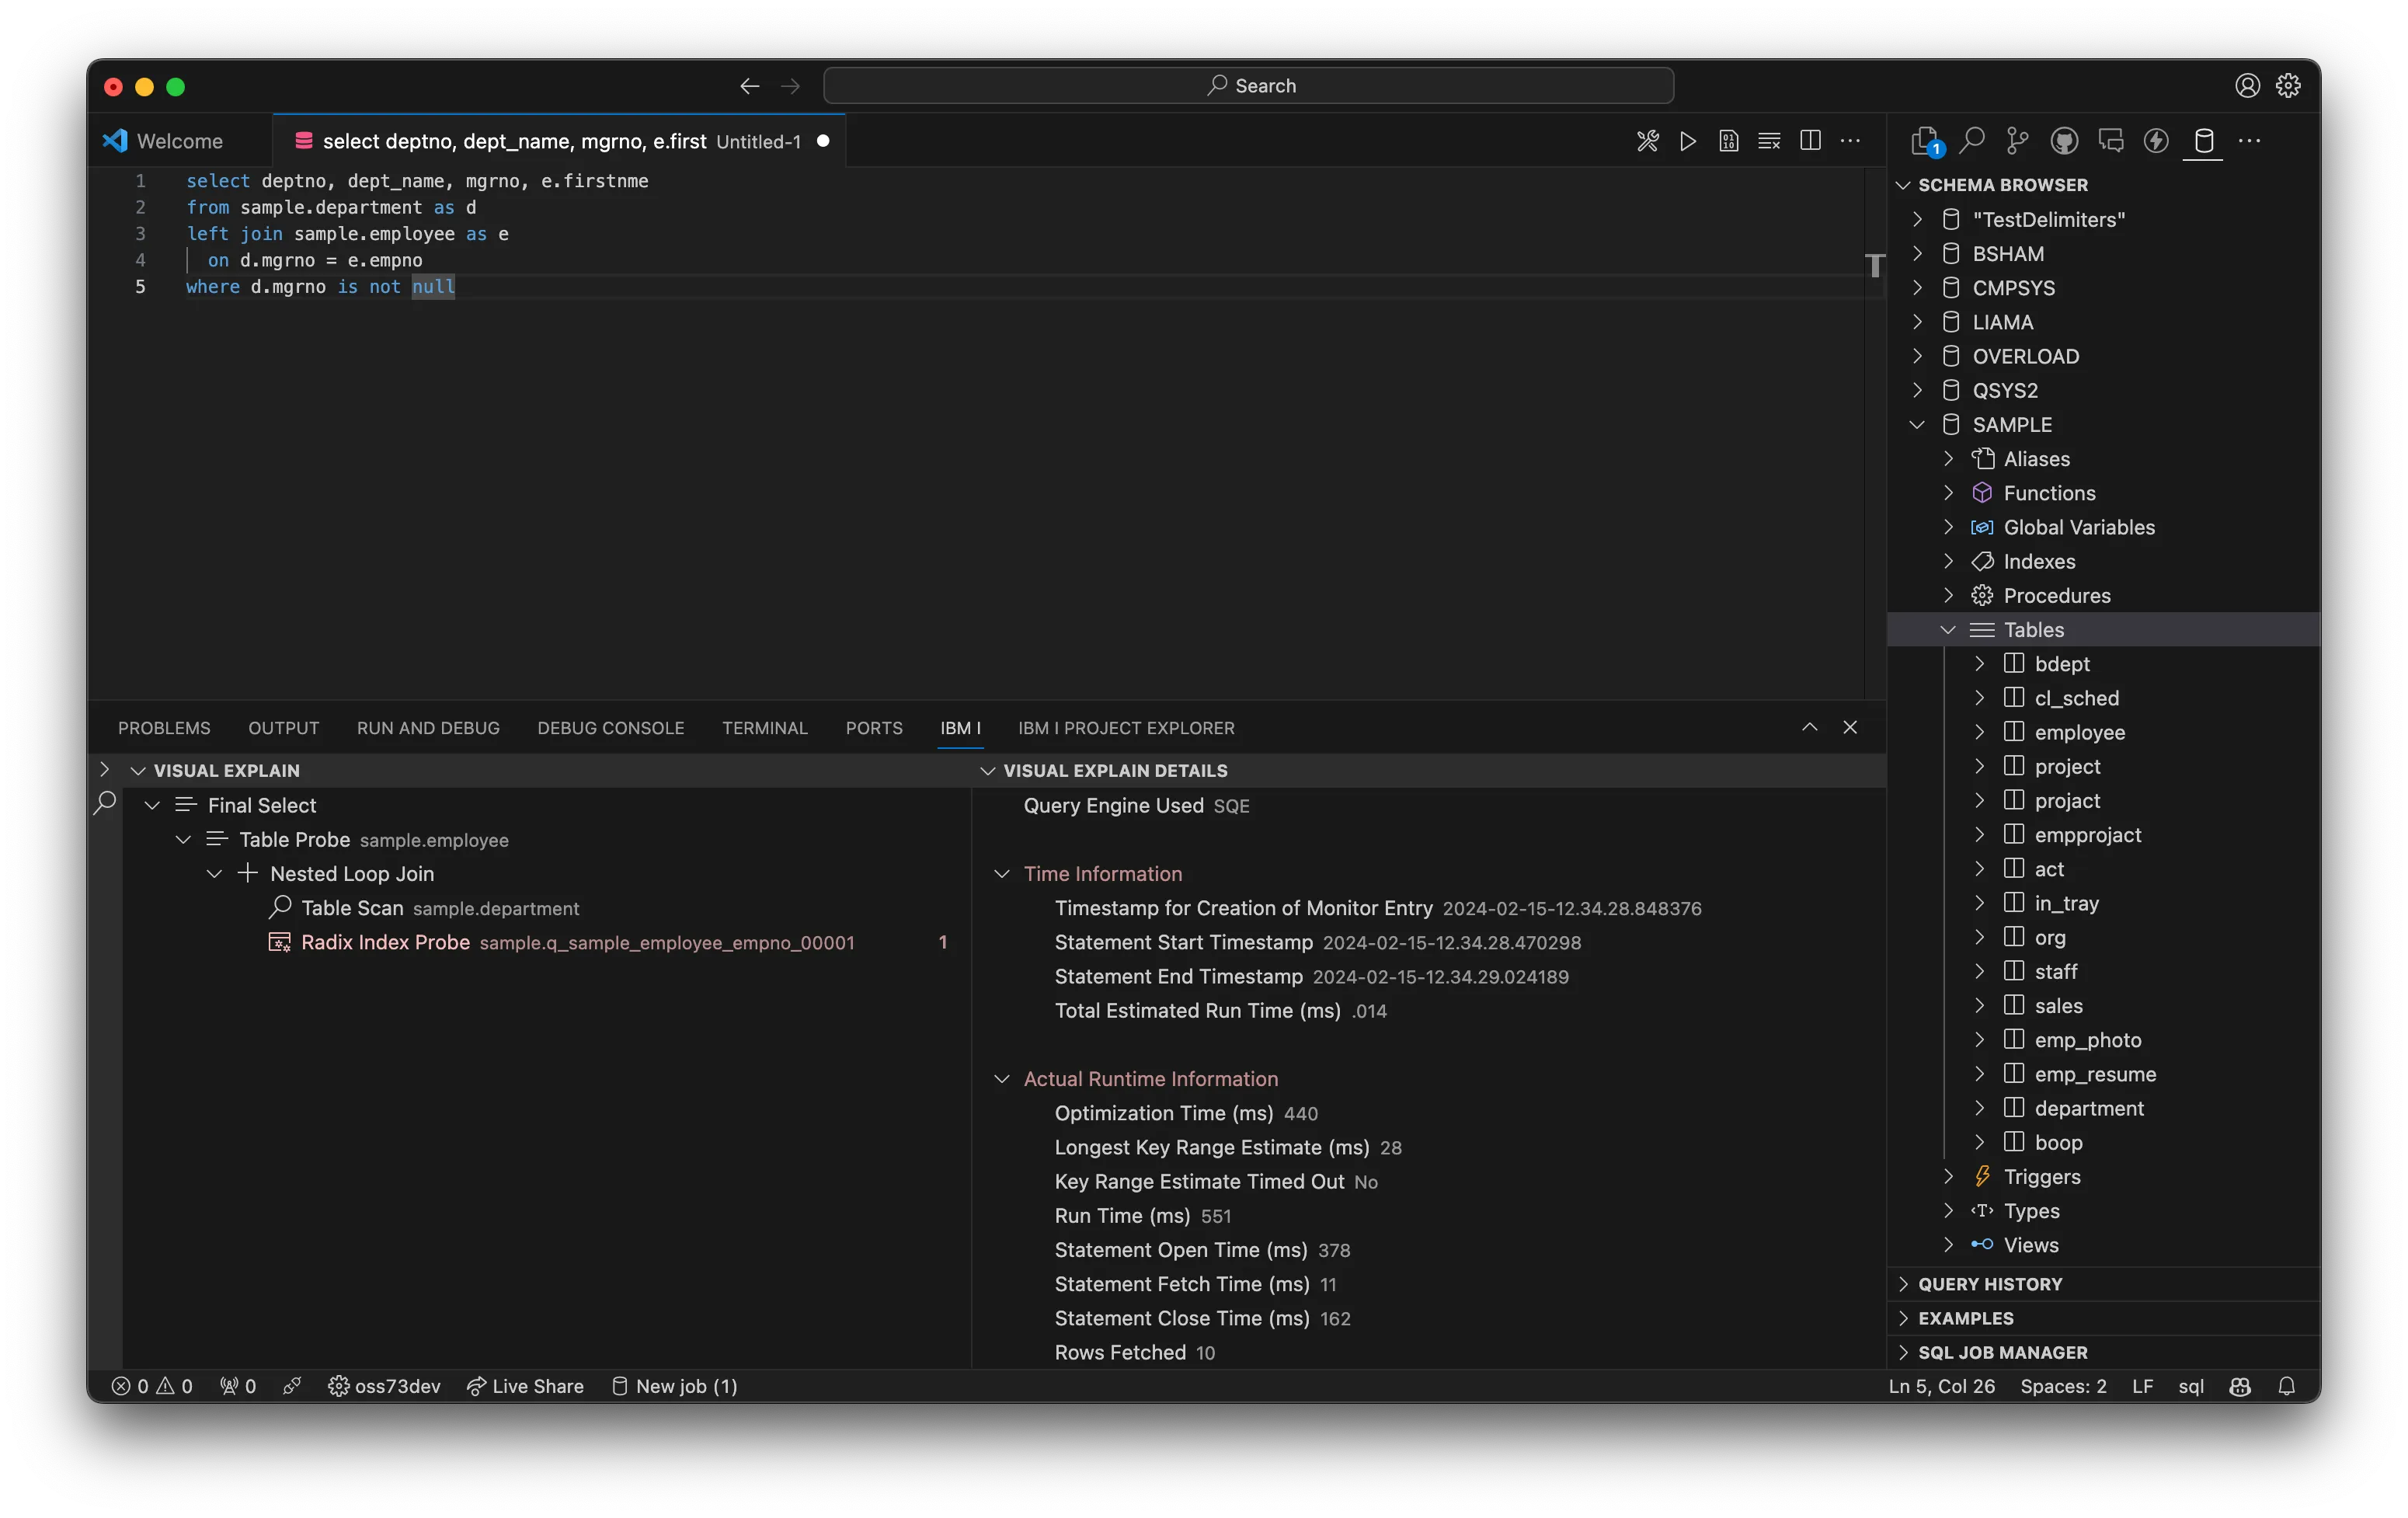
Visual Explain
We have added Visual Explain into the database extension with a more lightweight approach of explain data. The typical run button on the document now has options to either run, run and explain or explain without running, which will show the explain nodes and node details in the same result set view.
The Visual Explain view has a button on the header to control which nodes should be highlights, as well as the ability to export the data as JSON, and more.
Notebooks
Notebooks now supports Db2 for IBM i when using the database extension. If you have not heard of Notebooks before, check out this blog post on the Visual Studio Blog. IBM i Notebooks allow users to build documents of markdown, SQL statements and CL commands all in one view, that can be saved, re-used, re-run and shared to other people. This allows you to create documentation, a step-by-step guide, and many other things, specifically for IBM i.

How to create a Notebook
There are a few ways to create an IBM i Notebook:
- You can use the ‘New Notebook’ button on the SQL Job Manager
- You can find ‘IBMi i: New Notebook’ in the command palette.
- Open a
.inbfile (which stands for ‘i Notebook’)
The life of a Notebook
A notebook is made up of cells. A cell is associated with a language (for example, sql, cl, or markdown). Cells (other than markdown) can be executed. Each cell has a result and typically gets rendered below the cell input after execution.
Execution is different for each language type:
- If it is
sql, then a table will be returned of the result set. Notebooks do not support paging - it will return all rows. The SQL statements will be executed through the selected job in the SQL Job Manager. - If the language is
cl, then when it is executed it will run a CL command and return the resulting output.
You are able to use the stop and play buttons on the cells to request a cancellation of the execution. There is also a ‘Run All’ button, which will execute all cells.
Charting with SQL
Notebooks have the power to chart data that is returned from the database. It is most useful for rendering numerical data (on the Y axis) by another value (on the X axix). Here are the supported chart types, which are used for specifying the chart type:
- bar
- line
- doughnut
- pie
- polar area (
polarArea) - radar
To render a chart using SQL in a Notebook, two rules must be met:
- You must provide the chart type (via comment tag or statement prefix)
- There must be a
LABELcolumn for the X axis. - One or more numeric columns for the plotted data
- You can also provide a
_descstring column for each numeric column to provide additional information in the tooltip - For numeric columns to use formatted names, provide a fixed column name:
salary as "Salary"
- You can also provide a
Optional tags as comments can also be provided. Optional tags are formatted as so:
chart- which can be used instead of the chart prefixtitle- appears above the chart for a titley- for a title to appear on the Y axishideStatement- only acceptstrue, and when provided will hide the SQL statement from the exported Notebook
bar: select empno as label, salaryfrom sample.employee limit 10--chart: barselect empno as label, salaryfrom sample.employee limit 10--chart: bar--y: NZDselect empno as label, salary as "Salary", 'Does not include ' concat rtrim(char(bonus)) concat '\nbonus for ' concat rtrim(firstnme) as "Salary_desc"from sample.employee limit 10--title:--chart: lineselect empno as label, salary, bonusfrom sample.employeeorder by salary asclimit 10Keyboard Shortcuts
The following keyboard shortcuts are set by the extension. This can be freely customized using the Open Keyboard Shortcuts command from the command palette.
| Command | Windows | MacOS |
|---|---|---|
| Run statement | ctrl+r | cmd+r |
| Run statement in new view | ctrl+alt+r | cmd+ctrl+r |
| Run all statements | ctrl+shift+a | cmd+shift+a |
| Run statements from cursor | ctrl+shift+r | cmd+shift+r |
| Run and explain statement | ctrl+u | cmd+u |
| Explain without running | ctrl+e | cmd+e |
| Open SQL Document | ctrl+alt+n | cmd+alt+n |
| Execute cell | ctrl+r | cmd+r |